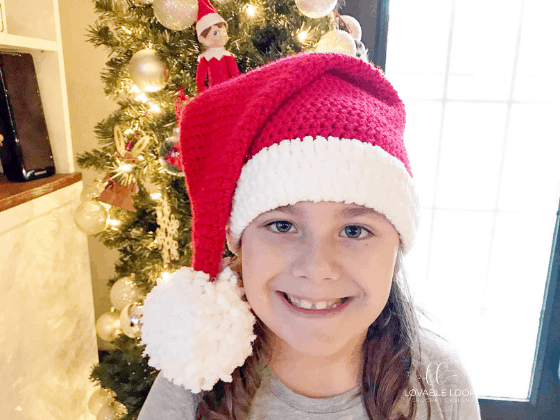


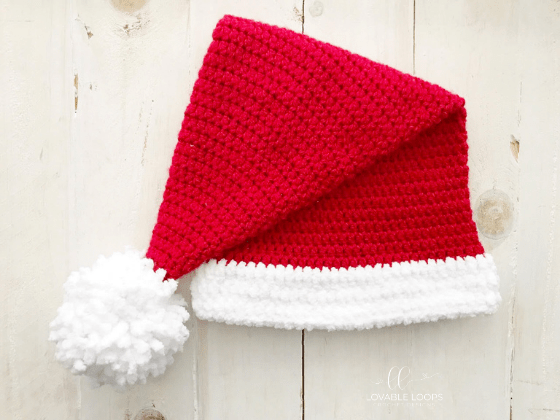
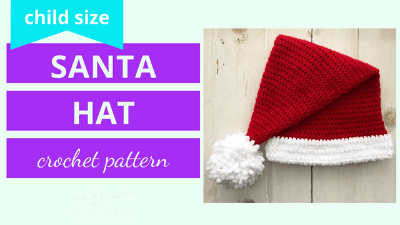
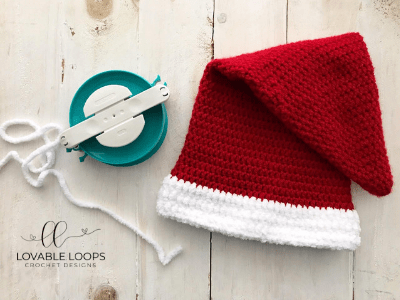
After designing my Santa Beanie and my Candy Cane Hat, I decided that I needed a traditional Santa hat. My husband and I are surprising our kids with a trip to Disney in a couple weeks and I’m hoping to have one of these hats for each of us to wear for our photo in front of Cinderella’s castle. I’m planning to make each hat in a different color so I’ll share photos as I finish them. Please tag me on Instagram or Facebook if you make your own!
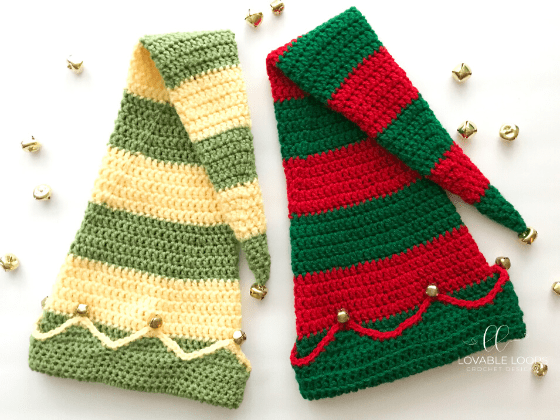
If you like my Santa Hat, be sure to check out my Elf Hat, too!
If you prefer to purchase a printable PDF of this pattern, click here to go to my Etsy shop.
Scroll to the end of this post for even more free Christmas patterns.
– Crochet Hook: I 5.5 mm (I love these Clover hooks!) or hook needed to obtain gauge

– extra large pom pom maker
–hot melt adhesive
– tapestry needles
– stitch markers
– Yarn: worsted weight in red and white (just a scrap) and super bulky in white
CLICK HERE to watch my Santa Hat Tutorial
Toddler, Child & Teen/Adult
15 dc= 4″ and 10 rows= 4″
-you are crocheting in the round
-hat is worked from the top down
-the ch 2 at the beginning of each round never counts as your first stitch
CLICK HERE to visit my Basic Beanie pattern for more information on how I size my hats.
ch- chain
dc- double crochet
rnd- round
rnds- rounds
st- stitches
sts- stitches

Crochet hook: I 5.5 mm
Yarn: red
Instructions between two asterisks should be repeated for the remainder of the round.
Rnd 1: chain 3, make 8 dc in the 3rd ch from the hook, join in the round [8]
Rnd 2: ch 2, *2 dc, dc in next st*, join [12]
Rnd 3: ch 2, dc in each st, join [12]
Rnd 4: ch 2, *2 dc, dc in next 2 sts*, join [16]
Rnd 5: ch 2, dc in each st, join [16]
Rnd 6: ch 2, *2 dc, dc in next 3 sts*, join [20]
Rnd 7: ch 2, dc in each st, join [20]
Rnd 8: ch 2, *2 dc, dc in next 4 sts*, join [24]
Rnd 9: ch 2, dc in each st, join [24]
Rnd 10: ch 2, *2 dc, dc in next 5 sts*, join [28]
Rnd 11: ch 2, dc in each st, join [28]
Rnd 12: ch 2, *2 dc, dc in next 6 sts*, join [32]
Rnd 13: ch 2, dc in each st, join [32]
Rnd 14: ch 2, *2 dc, dc in next 7 sts*, join [36]
Rnd 15: ch 2, dc in each st, join [36]
Rnd 16: ch 2, *2 dc, dc in next 8 sts*, join [40]
Rnd 17: ch 2, dc in each st, join [40]
Rnd 18: ch 2, *2 dc, dc in next 9 sts*, join [44]
Rnd 19: ch 2, dc in each st, join [44]
Rnd 20: ch 2, *2 dc, dc in next 10 sts*, join [48]
Rnd 21: ch 2, dc in each st, join [48]
Rnd 22: ch 2, *2 dc, dc in next 11 sts*, join [52]
Rnd 23: ch 2, dc in each st, join [52]
Rnd 24: ch 2, *2 dc, dc in next 12 sts*, join [56]
Rnd 25: ch 2, dc in each st, join [56]
Rnd 26: ch 2, *2 dc, dc in next 13 sts*, join [60]
Rnds 27- 40: ch 2, dc in each st, join [60]

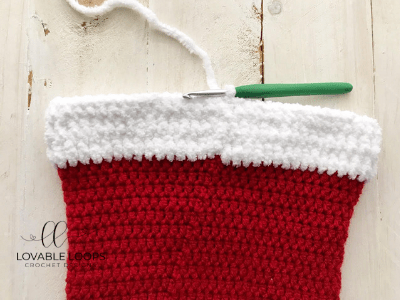
Switch to white yarn.
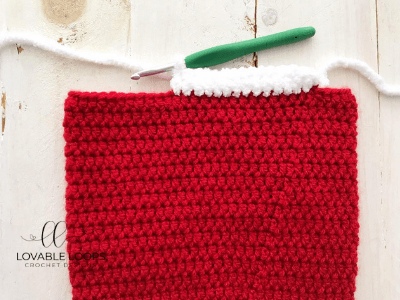
Rnds 41- 43: ch 2, dc in each st, join [60]
Crochet hook: I 5.5 mm
Yarn: red
Instructions between two asterisks should be repeated for the remainder of the round.
Rnd 1: chain 3, make 8 dc in the 3rd ch from the hook, join in the round [8]
Rnd 2: ch 2, *2 dc, dc in next st*, join [12]
Rnd 3: ch 2, dc in each st, join [12]
Rnd 4: ch 2, *2 dc, dc in next 2 sts*, join [16]
Rnd 5: ch 2, dc in each st, join [16]
Rnd 6: ch 2, *2 dc, dc in next 3 sts*, join [20]
Rnd 7: ch 2, dc in each st, join [20]
Rnd 8: ch 2, *2 dc, dc in next 4 sts*, join [24]
Rnd 9: ch 2, dc in each st, join [24]
Rnd 10: ch 2, *2 dc, dc in next 5 sts*, join [28]
Rnd 11: ch 2, dc in each st, join [28]
Rnd 12: ch 2, *2 dc, dc in next 6 sts*, join [32]
Rnd 13: ch 2, dc in each st, join [32]
Rnd 14: ch 2, *2 dc, dc in next 7 sts*, join [36]
Rnd 15: ch 2, dc in each st, join [36]
Rnd 16: ch 2, *2 dc, dc in next 8 sts*, join [40]
Rnd 17: ch 2, dc in each st, join [40]
Rnd 18: ch 2, *2 dc, dc in next 9 sts*, join [44]
Rnd 19: ch 2, dc in each st, join [44]
Rnd 20: ch 2, *2 dc, dc in next 10 sts*, join [48]
Rnd 21: ch 2, dc in each st, join [48]
Rnd 22: ch 2, *2 dc, dc in next 11 sts*, join [52]
Rnd 23: ch 2, dc in each st, join [52]
Rnd 24: ch 2, *2 dc, dc in next 12 sts*, join [56]
Rnd 25: ch 2, dc in each st, join [56]
Rnd 26: ch 2, *2 dc, dc in next 13 sts*, join [60]
Rnd 27: ch 2, dc in each st, join [60]
Rnd 28: ch 2, *2 dc, dc in next 14 sts*, join [64]
Rnds 29- 43: ch 2, dc in each st, join [64]
Switch to white yarn.
Rnds 44- 46: ch 2, dc in each st, join [64]
Crochet hook: I 5.5 mm
Yarn: red
Instructions between two asterisks should be repeated for the remainder of the round.
Rnd 1: chain 3, make 8 dc in the 3rd ch from the hook, join in the round [8]
Rnd 2: ch 2, *2 dc, dc in next st*, join [12]
Rnd 3: ch 2, dc in each st, join [12]
Rnd 4: ch 2, *2 dc, dc in next 2 sts*, join [16]
Rnd 5: ch 2, dc in each st, join [16]
Rnd 6: ch 2, *2 dc, dc in next 3 sts*, join [20]
Rnd 7: ch 2, dc in each st, join [20]
Rnd 8: ch 2, *2 dc, dc in next 4 sts*, join [24]
Rnd 9: ch 2, dc in each st, join [24]
Rnd 10: ch 2, *2 dc, dc in next 5 sts*, join [28]
Rnd 11: ch 2, dc in each st, join [28]
Rnd 12: ch 2, *2 dc, dc in next 6 sts*, join [32]
Rnd 13: ch 2, dc in each st, join [32]
Rnd 14: ch 2, *2 dc, dc in next 7 sts*, join [36]
Rnd 15: ch 2, dc in each st, join [36]
Rnd 16: ch 2, *2 dc, dc in next 8 sts*, join [40]
Rnd 17: ch 2, dc in each st, join [40]
Rnd 18: ch 2, *2 dc, dc in next 9 sts*, join [44]
Rnd 19: ch 2, dc in each st, join [44]
Rnd 20: ch 2, *2 dc, dc in next 10 sts*, join [48]
Rnd 21: ch 2, dc in each st, join [48]
Rnd 22: ch 2, *2 dc, dc in next 11 sts*, join [52]
Rnd 23: ch 2, dc in each st, join [52]
Rnd 24: ch 2, *2 dc, dc in next 12 sts*, join [56]
Rnd 25: ch 2, dc in each st, join [56]
Rnd 26: ch 2, *2 dc, dc in next 13 sts*, join [60]
Rnd 27: ch 2, dc in each st, join [60]
Rnd 28: ch 2, *2 dc, dc in next 14 sts*, join [64]
Rnd 29: ch 2, dc in each st, join [64]
Rnd 30: ch 2, *2 dc, dc in next 15 sts*, join [68]
Rnds 31- 48: ch 2, dc in each st, join [68]
Switch to white yarn.
Rnds 49- 51: ch 2, dc in each st, join [68]
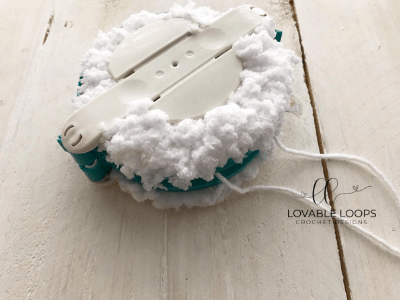
Tool: extra large pom pom maker
Yarn: white
Firmly and evenly wind your white yarn around each set of arches. After the first set of arches, close them and then wind your yarn around the second set.
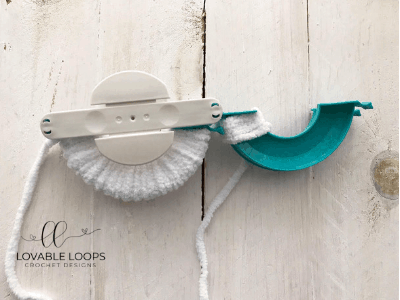
Cut the yarn between each set of arches.

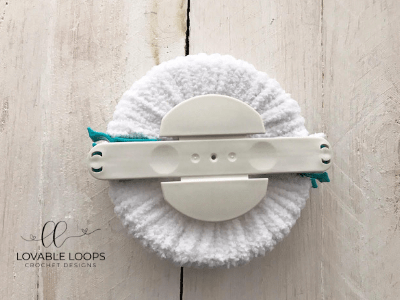
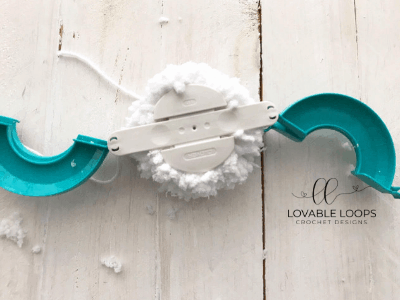
Use your scrap piece of white yarn to tie the pom pom in place. I recommend you double/triple knot it.
Carefully open the arches.
Use a hot melt adhesive to place a dab of glue in the center of the pom pom. This will help prevent it from unraveling.
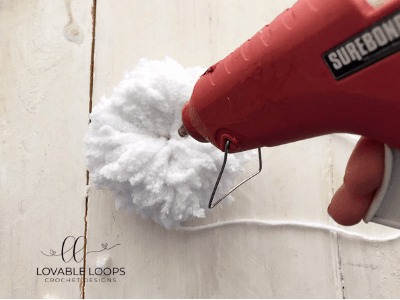
Fluff your pom pom and trim any long ends.
Use a tapestry needle to attach your pom pom to the top of your hat.
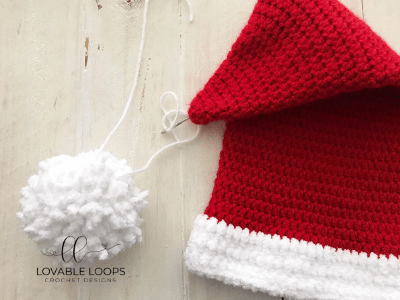
I hope you like my pattern! Please tag me on Instagram or Facebook if you make your own. I’d love to see your creations!